Actually, I made these shoes a year ago, so I'm having to remember just how I did this. Please bear with me.
When my last pair of shoes for this period wore out (they were an incredible second-hand store find), I decided that I would finally make a pair myself. I had talked about it for a long time and now was the perfect opportunity to do it. Besides, it was that or go barefoot because there was just no way to fix the old ones. They were too far gone! I was also in need of another pair to go with a fantasy outfit that was in progress. I used the same basic pattern for both. (That was a mistake but I didn't realise it out until last weekend. Oops....)
The first thing I did was to trace around both feet on two separate sheets of paper. Then I put the two tracings face together and evened out the outlines. (They were a pretty close match to begin with.) Next, I added a 1/4 inch seam allowance to one pattern and cut a piece of scrap fabric to this shape discarding the unaltered pattern.
To get the shape of the upper, I rummaged for a larger scrap and, putting my foot on the cloth sole pattern on the floor, I placed the fresh scrap on that foot and just sort of draped it into position to cover the front/top of my foot. I found I needed a straight strip to go around the back and join to this at the sides. I traced around on this, took it apart and after evening the lines, added a 1/4 inch allowance and cut those two out. Then, I basted all three together (sole, front upper and heel strip) and tried it on. It would work! After a quick turn inside out(actually, right-side-out) for the other foot, it was found to work there, too. I had a pattern.
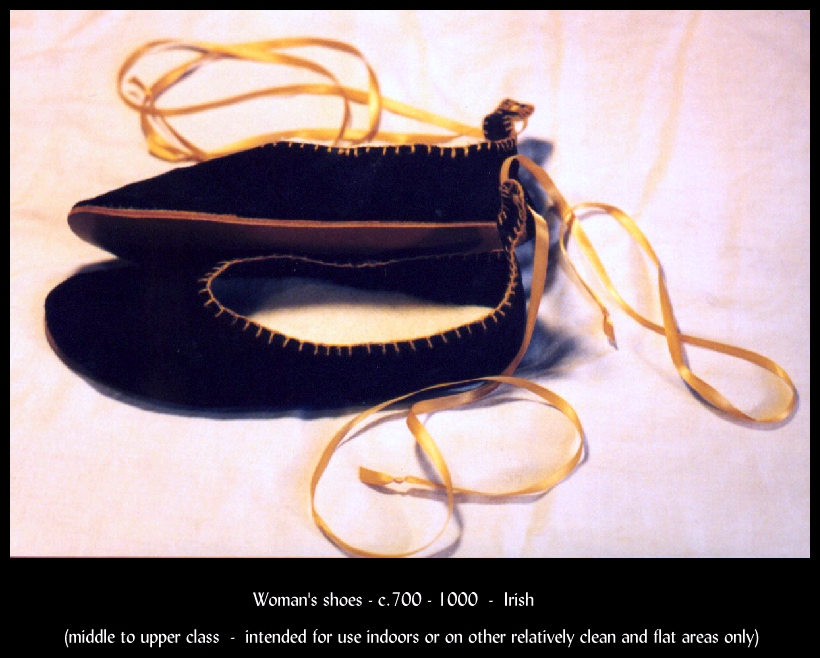
For the medieval shoes, because I had seen evidence in archeological dig books, I added a narrow vertical strip at the back to run an ankle ribbon through. (Yes, medieval ankle-strap shoes!)
I picked out a chunk of dark blue suede from my stash and got busy. In the process, I realised that the suede would not be strong enough or thick enough for outdoor use so I cut a second sole peice out ot ocher-colored butt hide for each shoe.
Putting these together was very easy although time-consuming as well as managing to make my fingers sore. Yes, I hand-stitched them. First, I used a stitch-hole punch to make the seam lines, then it was basically a matter of lacing the pieces together using a pair of needles on a single thread.
First I joined the front uppers to the heel strip uppers. Cutting the waxed linen thread about 3 (or was it 3 and 1/2?) times longer than the seam plus a bit for manoeuvering room, I threaded a needle onto each end of it. With the centerpoint of the length of thread crimped so I could find it again, I passed both needles through the first set of stitch-holes, one from each side so they crossed paths within the hole and pulling it snug with the crimped center at the starting edge of the seam to bind it together there, too. I continued stitching, pushing the needles past each other in the holes and getting a continuous twining pattern when I saw it in my mind's eye. When I got to the end, I tied off and ran the tails back into the seam, one on each side whipping around the previous stitching for about 3-4 stiches and then cut the thread. These four seams (two on each shoe) went together fairly quickly. After stitching them, I opened them out flat and hammered them with a rubber hammer so really flatten them and set the seams.
When I started to join the uppers to the suede soles, I saw that life would be a lot easier if I pinned the upper to the sole at four places; the toe, the heel, and both side seams. Sewing was the same as on the little side seams expect my fingers got more tired. Leather has a tendency to grab the needles as well as the thread. That's when I remembered to use a pair of flat-jawed jeweler's pliers to pull the needles through. While I found myself wishing for a stitcher's pony (an upside-down-T shaped contraption that is used when sitting down and fits between and under one's legs and holds the work above one's lap), the work progressed at a good pace.
After finishing those seams and turning, working and hammering the seams as best I could, it was time to blanket-stitch the edges with a yellow-gold wool thread that matched the satin ribbon that I was going to use for ankle ties. That went fast enough. I then glued the heavier soles onto the outsides using Barge Cement, tucked the purchased wool-pad insoles into place and strung the ribbons through the pairs of little vertical slits I made in the tops of the heel extensions. I tried them on and they felt heavenly! Ooh, those wool-pad insoles were nice!
A week or two later, I wore them to an outdoor event and they were great. What I did not take into account was that that event while outdoors was in a manicured park that had sidewalks. Last week, I wore them at a truly outdoor event; rough terrain, dust, rocks, the whole bit. They dealt with the rocks just fine but, oh, my feet got dusty and the ribbons kept coming untied from the exertion of the going over the rough terrain. The next pair will be ankle-boots not ankle-strap shoes while these will get cleaned up and used for more "civilised" events.